Whenever I am eating at a fast food restaurant I expect that (1) my orders are served quickly and (2) the restaurant staff will treat me nicely. These are just simple expectations but there are fast food restaurants that fail to fulfill these expectations of mine. One of such restaurant is the SM Megamall branch of Goldilocks.
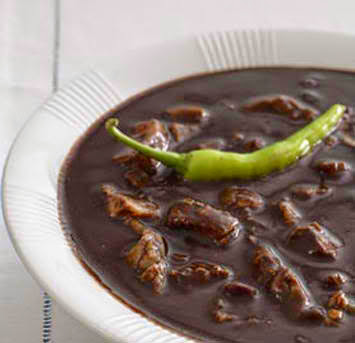
My beloved wanted to have dinuguan for dinner so we went to Goldilocks. I noticed that there are two queues inside the restaurant. One queue is for those who are ordering Goldilocks cakes. The other queue is for those who are ordering the Goldilocks meal.
The queue for the Goldilocks meal is quite long. The reason for this is that there is only one cashier and only two employees assembling the orders of the customers. Another bad thing is that customers had to wait on line while waiting for their orders to be assembled. The result is that customers became impatient, which made them nasty. The impatience of the customers also affected the staff of Goldilocks. Maybe that is the reason why the cashier is not smiling when she served our orders.
Goldilocks is like a big carinderia and this image is reinforced in the way they present their dishes. However, I find the restaurant’s Filipino image weird because the name Goldilocks is so American.
.
In fairness, Goldilocks’ dinuguan tasted good. It is no surprise that this dish is My Beloved's favorite. We also also ordered the Veggie Lumpia but it is too sweet for our liking.
This is Goldilocks’ kare-kare, which just tasted OK.
My advice to Goldilocks is that they improve their system of getting orders from their customers. They should copy the system of other fast food restaurants like Jollibee and Mang Inasal. Customers are given numbers so they can leave the queue and go to their seats. It is the restaurant staff that will bring the ordered dishes to the customers. This will reduce the number of impatient customers and un-smiling cashiers.
---
Photos of pork dinuguan and veggie lumpia came from Goldilocks website.
How about you Dear Reader? Did you dine in Goldilocks Megamall. What is your experience on their service? Let us talk about it by leaving a comment.
---
Photos of pork dinuguan and veggie lumpia came from Goldilocks website.
How about you Dear Reader? Did you dine in Goldilocks Megamall. What is your experience on their service? Let us talk about it by leaving a comment.


