Showing posts with label Cookery. Show all posts

A Failed Attempt in Cooking Dinengdeng

.
Overstaying vegetables are one of our usual home problems. Some vegetables take more than a week in the fridge because we either don’t have the time to cook them or they’re just too many.

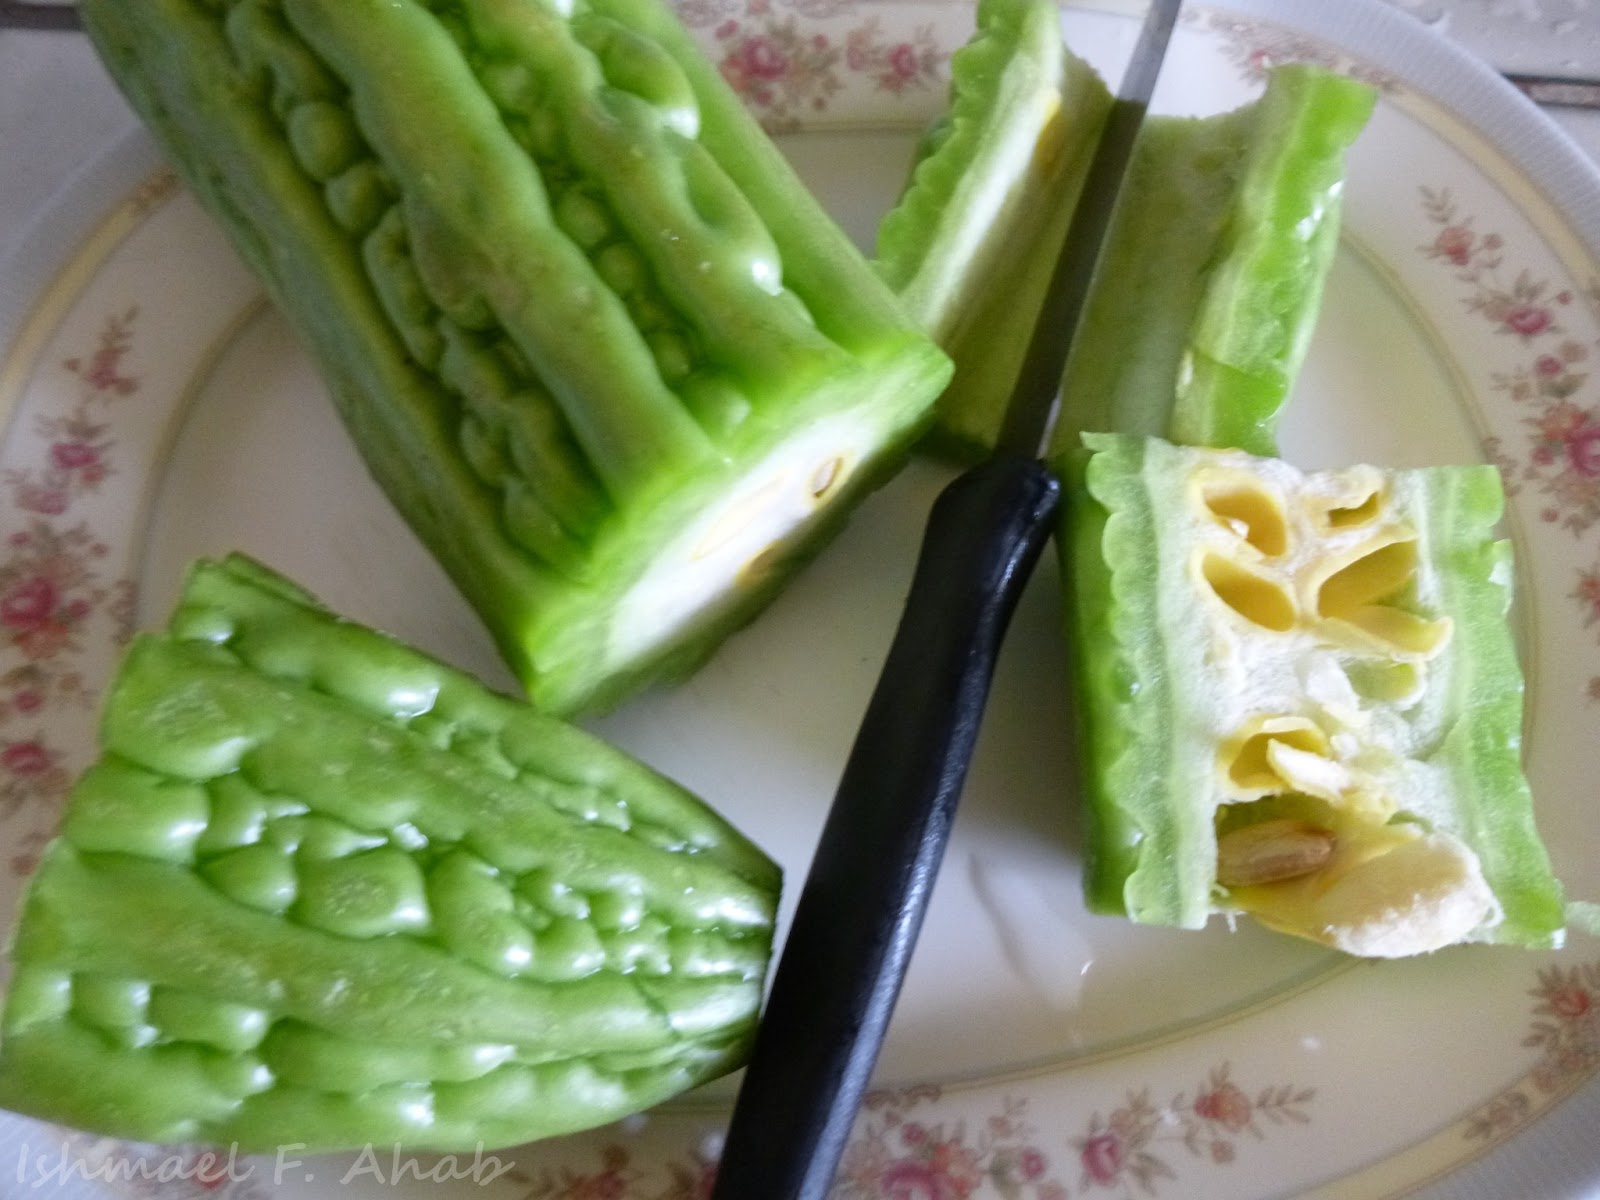
Upon opening the fridge one day, I noticed that we have ampalaya (bitter gourd), talong (eggplant), sitaw (string beans), and takway. Their freshness is gone and they will be sent to the trash can if they stayed longer in the fridge. Throwing these veggies means throwing away hard-earned money, so I decided to salvage them.

After a bit of Google search, I discovered this popular Ilocano dish: dinengdeng.

The original dinengdeng
Photo by :Thepacificconoisseur / en.wikipedia


Dinengdeng is just a mixture of veggies and bagoong. Cooking this dish is very easy. It is the perfect dish for our overstaying veggies.

Ingredients for Dinengdeng

Talong
Sitaw
Ampalaya
Takway
Tomatoes (3 pcs)
Onion (1 pc)
Salt
Magic Sarap
Bagoong Isda
Pork (bite-size and fried)

How I Cooked Dinengdeng

1. The first thing that I did is to cut the ampalaya, talong, sitaw, and takway to bite-sized slices. I then sliced the sibuyas into two and quartered the tomatoes.

Vegetables for dinengdeng


2. I boiled the water in a pot and then placed the tomatoes and the onion. I then added the bagoong isda. I let the mixture simmer for a while. The scum forming at the sides of the pot were promptly removed.

3. I threw in the talong, sitaw, ampalaya, takway, and the fried pork. I let it simmer until the veggies are cooked.

4. I then added Magic Sarap and salt until it tastes OK.

5. I finally served it hot for dinner.

My Cookery Result

My version of dinengdeng


My dinengdeng tasted very bitter. Even Lei made the same remark. It’s so bitter that she didn’t eat it. The taste is not surprising because I placed 1 and a half amplaya in this dish.

I had no choice but to eat it all of it. I think I finished eating my dinengdeng after three meals. The sad part is that ampalaya is my most hated vegetable. I think eating this dinengdeng was my punishment for cooking so badly.

My consolation is that ampalaya is known to be good against diabetes.

---

You just finished reading a Foodie Sunday post. This a blog post series where I post about our foodie adventures. Expect to read about food; from homecook meals. to street food. to fine dining, to fast food, even the weird edible things.
.

I Cooked Tinolang Bangus

.
This Sunday, My Beloved Wife asked me to cook for lunch. She requested that I cook a dish that is masabaw (soupy). I suggested sopas, nilagang baboy (boiled pork), sinigang, fish paksiw, but she didn’t want any of it. In the end, she said that she wanted tolang (or tinolang) bangus.

When I was in Davao for the first time, a friend said that we’ll be eating tinola for dinner. I expected that I’ll be eating chicken but what I got is fish. For the Tagalogs, tinola means tinolang manok. I didn’t expect that the Visayans also use fish for their tinola.

Now, let’s cook tinolang bangus. Here are the ingredients:

Ingredients for tinolang bangus


Kamatis (tomatoes)
Medium-sized bangus (milkfish)
Hugas bigas
Sibuyas (onion)
Luya (ginger)
Malunggay
Salt

How I “Cooked” Tinolang Bangus


1. Remove the malunggay leaves from the stalk. This is the most boring part of this cookery. I suggest that you watch the conyo teens (YouTube video below) while doing this.

.
2. Slice the kamatis and sibuyas into four. 3. Slice bangus into 4 pieces. (Tip: you can ask the vendor to do this when you buy the bangus). 4. Pour the hugas bigas into the pot. Place the bangus, sibuyas, and kamatis. Bring the mixture to boil. 5. Place the luya when the mixture started to boil.
.
Simmering tinolang bangus
.
6. Let it simmer for a while. Add water if you notice if most of the hugas bigas had evaporated. 7. Place the salt according to your taste. 8. Place the malunggay leaves and leave it simmering for a minute. Voila! Now my tinolang bangus is done.
.
Tinolang Bangus
.
I admit that I didn’t cook this dish alone. My Beloved Wife assisted me. Well, she’s a better cook than me.

Come, let’s eat.

---

You finished reading a Foodie Sunday post. This a blog post series where I post about our foodie adventures. Expect to read about food; from homecook meals. to street food. to fine dining, to fast food, even the weird edible things.
.

My Beloved Wife Cooked Ginataang Kalabasa

During my stay in Thailand, I was forced to learn cooking because no one was there to cook for me and eating Thai instant noodles for 6 months is not good. I cooked the failed tortang talong, carbonara-style spaghetti, weird afritada, and my favorite pork adobo.

Now that I’m a married man, it is My Beloved Wife who does much of the cooking. Last Sunday she cooked her own version of Ginataang Kalabasa and Sitaw. Our guide for this cookery is the recipe in Panlasang Pinoy website.

Her ingredients are:

Shrimp, already cooked by boiling and the shell removed
Pieces of chicken meat
Kalabasa (squash), diced
Sitaw (string beans), cut to bite-size
Onion
Bell pepper
Gata (coconut milk)
Tomatoes, sliced
Bagoong (shrimp paste)
Salt
Pepper
Cooking oil
.
Ingredients of ginataang kalabasa

She started the cookery by preparing the ingredients. She squeezed out the coconut milk; diced the kalabasa; sliced the sitaw, onions and bell pepper; and cut pieces of chicken meat.

Slicing chicken meat for ginataang kalabasa

You might be wondering what I’m doing while she’s doing all the hard work. Well, I just took the photos. I left the cooking to the expert. :-)

Next is she sautéed the garlic and onion, followed by tomatoes, then the chicken meat and the bagoong. Then she placed the shrimps.

Cooking ginataang kalabasa

Then she poured the gata. The diced kalabasa was then placed when the gata started boiling. The sitaw followed the fray. The last to join the pot is the bell pepper. My Beloved Wife waited for the last two veggies to be cooked before placing salt and pepper, according to her taste.

And the result is…

Ginataang Kalabasa

…a yummy ginataang kalabasa.

And I’m not the only one who said that My Beloved Wife’s ginataang kalabasa is delicious. Her office mates, even her boss, praised her ginataang kalabasa.

---

My Beloved Wife said that the first squeeze of gata should be placed last (maybe after placing the kalabasa and the sitaw) to make the ginataang kalabasa more creamy. The second squeeze of gata is the one that should be placed after the sauté.
.

My First Try of Tortang Talong Recipe

One of the things that I miss in Thailand is my cooking. I know that I’m a failure when it comes to cookery but I enjoy risking my life to create an edible-but-sometimes-not dish.

There is one vegetable that I played around during my 6-month stay in Thailand. I cooked two types of dishes for this veggie. One dish is adobo, which a failure. Another dish is the torta and you’ll be the judge if what I cooked is also a failure.

The veggie that I’m talking about is the talong (eggplant).

Now let me show you how I cooked the tortang talong recipe.

Step 1: Peeling of the Talong Skin


The first thing that I did is that I place the talong over the fire of my stove. The purpose of this is to burn the eggplant’s skin so as to make it easy to peel.

Tortang talong recipe - burnt and peeled eggplant


The grocery where I bought the talong only had the unripe green ones. I’ve been searching for the violet-colored talong to no avail.

The talong is so hot so I used fork to peel away the skin.

Step 2: Preparing the Egg Mix


Tortang talong recipe - egg and breading mix


I beat two pieces of egg. I had a chicken breading sitting in the cupboard for so many months so I mixed it with the egg. I felt that I already messed up when I mixed the breading.

Step 3: Talong + Beaten Egg


Tortang talong recipe - eggplant in the egg and breading mix


I then placed the talong in the egg mix. I made sure that the mix covered the whole talong.

Step 4: Fry Time


I placed the talong with egg mix to the pan with hot oil. I cooked both sides of the torta. Cooking this tortang talong recipe is very quick. It is just like cooking an egg omelette.

And voila, here is the tortang talong:

Final product of my tortang talong recipe


I know it is not a perfect tortang talong and it looks terrible. The breading got burnt too. Maybe I’ll not add chicken breading to my next tortang talong. The tortang talong tasted OK because it tasted like fried chicken because of the breading.

How about you, dear Reader, what can you say about my tortang talong?

Food for Lent: Fish Sausage

I had a hard time during looking for something to cook during the Lenten Season. I vowed not to eat meat so my only option was to cook fish and vegetables. Unfortunately, fresh fish is “rare” in the area where I stayed in Thailand. I was also a picky fish eater. I only eat the familiar fish like the bangus and tilapia.

Because of these constraints, my diet during the Lenten Season consisted of eggs, fish balls, Mama noodles and vegetables. One day, while I was in the grocery, I chanced upon this:

Mince fermented fish from Big C
Minced fermented fish from Big C.


I had second thoughts in buying the minced fermented fish because it was new to me. I didn't want to buy food that I might not like because I will just throw them away.

So, I walked around the grocery to check the fish balls, walked around to check the frozen fish and then checked the fish balls again. I decided in the end to buy the minced fermented fish because I was already satiated with the fish balls.

I called the minced fermented fish as fish sausage because it looked like a regular sausage. I was not sure if the fish meat is packed in pork intestine to prevent them from falling apart.

Two packs of minced fermented fish


I sliced the fish sausage then I fried them. It was very easy to cook. I finished cooking it after few minutes.

Fish sausages being fried


One piece of the fish sausage is enough for a cup or so of rice.

Fish sausage with rice


It tasted good enough that I bought another pack. The minced ferment fish doesn't taste good as the regular sausage but it is a fine alternative for the pork, beef and chicken meat during Lent.

Ampalaya with Egg

I hate ampalaya. When I was a little kid, I always complain to my mother whenever we have this vegetable for dinner. I usually argue that ampalaya is bitter because it is poisonous. But she didn't say anything to contradict me. She just continued eating the ampalaya, as if to prove that it is not a poisonous veggie.

My Beloved declared that her favorite vegetable is Ampalaya. She told me that she will cook it more often so I should better try to like it. (Oh no!!!!)

Actually, my “hatred” to ampalaya has lessened a little bit. I can now eat it despite its bitterness.

It is now the Season of Lent for Catholics. I vowed not to eat meat for this whole season. Vegetable, egg and fish are now the stars in my menu. Thus, I cooked ampalaya with egg.

First thing that I did is to cut the ampalaya to bite-sized pieces.

Ampalaya being sliced


I then sauteed it on a hot pan.

Ampalaya being sauteed


I waited for the ampalaya to be cooked. I then poured the beaten egg. Then some vetsin (MSG) and fish sauce.

Voila! My ampalaya with egg is finished.

Ampalaya with Egg


The ampalaya is not fully cooked but I think that was ok because it made the ampalaya crunchy. 

It is still bitter but that's OK. It reminds me of the bitter part of my life. Yes, this ampalaya helped me reflect on many things. We can say that life is like food. Not all of it are sweet. We also have the sour days, or that period when salty tears are pouring, or the spicy anger that take holds of us, and then the bitter moments when we feel so much pain.

Some experts say that ampalaya is good against diabetes, malaria, cancer and other diseases. With medicinal effects like these. I might consider eating ampalaya, especially if it cooked by my Beloved.

Afritada de Ahab

I recently cooked one dish that I instantly liked. I enjoyed this dish so much that I even shared it on my Facebook wall, where it became an instant sensation not because it looked yummy but because they had a hard time believing that what I cooked can be called Afritada.

So in my defense, I'm calling the dish that I'll be featuring today as Afritada de Ahab:
.
Ishmael Ahab's version of chicken afritada


One of my Facebook friends called this kare-kareng afritada because the sauce made it look like kare-kare. Another one thought it was pochero. And I say they are wrong because this is not just an afritada. This is my own version of afritada. Wahahaha yes I found the perfect excuse.

I cooked my afritada by following the steps laid out by Filipino Recipes website. This website said that afritada is a Spanish inspired dish combining pork or chicken, potatoes, tomato sauce and spices.

I used Hunt's tomato sauce for Afritada de Ahab.
.
A can of tomato sauce I used for afritada


I had potatoes, drumstick chicken, onions, garlic, pepper, patis (fish sauce), and vetsin (MSG). I also had a pechay because I vaguely remember a tomato sauce dish cooked by my Mom that has pechay.
.
My vegetables for my afritada
Sliced potatoes and pechay.

My ingredients are ready so it's time to cook!

The recipe said that I need some chicken broth so I boiled the chicken for 20 minutes.
.
Chicken being boiled for broth for Afritada de Ahab


I made sure that the meat is fully cooked before I separate it from the broth. It is cooked if the meat comes off easily when peeled off from the bone using fork.

Next is I sautéed the sliced onions, sliced garlic and chicken for 5 minutes or when the meat is slightly brown.
.
Sautéing chicken meat for my afritada


I then poured the broth and the tomato sauce and let it simmer for 5 minutes.
.
My afritada is nearly cooked


I then added the sliced potatoes and let it simmer until it's cooked. Next to be thrown to the raging lava is the pechay. I let it simmer for 3 more minutes and then put patis (fish sauce), pepper and vetsin. I poured enough of those things until it suited the taste that I wanted.

The final product is Afritada de Ahab, as shown on the photo at the start of the post.

There's tomato sauce left after I cooked the Afritada de Ahab so I had to whip up another dish using it. The dish that I made using the tomato sauce is this:
.
My own version of pork giniling with tomato sauce
Pork giniling in tomato sauce.

I believe that these two dishes (excluding my pork adobo) are the best that I made so far. These dishes were easy to cook and doesn't demand a lot of effort. I'll cook more of these dishes and I will make sure to cook the real afritada next time.

My Very First Spaghetti

Note: Regular blogging is temporarily suspended to give way for my cookery.

I said previously that one of activities here in Thailand is learning how to cook. Well, I am glad to announce that my cooking had improved. I had cooked a lot of dishes and majority of them had tolerable taste.

I had a pack of pasta that was sitting in my cupboard for more than a month. I intend to use it for spaghetti. Every ingredient for the spaghetti is ready. I have a can of tomato sauce and some spices. Ground pork that I intended to use for the spaghetti came and went but no spaghetti was made.

I was too lazy to cook the tomato sauce for my spaghetti. I needed to find a way to dispose the pasta the easy way. The easy way that I found came by the name “Prego spaghetti sauce”.
.
Prego spaghetti sauce carbonara style

This can of Prego spaghetti sauce is not my favorite tomato sauce but a carbonara-styled sauce.

I don't have a big pot so I used the rice cooker to boil the pasta.
.
Boiling some pasta

I added 2 teaspoons of salt and let the mixture boil for around 9 minutes. I kept on checking the pasta so that it will be al dente (firm but not hard). How did I know that my pasta is already al dente? Well, I just followed the tip of mother. She said that the pasta is al dente if it still “hard” but will stick if thrown to the wall.

I threw three strands of pasta to the wall. I continued boiling the pasta if the strand refuse to stick to the wall.

I was happy when on the third throw the pasta strand stick to the wall.
.
Al dente pasta on the wall
Hooray! My pasta is al dente.

The next step is straining the water from the pasta.

My problem is that I don't have a strainer. So, I improvised a strainer from the net used for garlic that I bought from the grocery.
.
My improvised strainer
Pasta on improvised strainer.

Cooking the sauce is very easy. All I did was to heat the Prego spaghetti sauce on the pan and then pour it on the pasta.

Voila! My very first carbonara spaghetti is ready for eating.
.
My first pasta with carbonara styled Prego spaghetti sauce

Bon appetit! :-)

How I Cooked Pork Adobo

I had a slab of pork meat sitting in the fridge for almost a week. I was afraid that it will spoil so I decided to cook the whole slab into one of the popular Filipino dish, which is pork adobo.

It is my first time to cook a dish that is more complex than instant noodles and boiled eggs. Thus, I used the power of the Internet and searched for a good pork adobo recipe. I discovered the Panlasang Pinoy website that has a pork adobo recipe that is easy to follow.

I read the recipe very diligently. I didn't want to fail (like what happened to my fried chicken drumstick) because I didn't want to waste a whole slab of meat because it is expensive. I just started cooking pork adobo when I became confident enough that I can cook it.
.

My Ingredients for Pork Adobo

.
Since this dish is pork adobo, the major ingredient is pork meat:
.
Pork meat for Pork Adobo


Ms. Anney said that this meat is pork liempo or pork belly. I actually don't know what part of pork this meat is (ah such a noob) but I am glad that I got the correct meat. The recipe website said that I should use pork belly.

Other important ingredients are soy sauce and vinegar. Adobo will never be adobo if you don't have these.
.
Vinegar and soy sauce for my pork adobo.


I had hard time looking for a bottle of soy sauce in the grocery. Aside from I can't understand Thai writing, soy sauce for sale are few. It seems like this condiment is not popular in Thailand.

I also needed garlic and pepper corn (pamintang buo).
.
Garlic and pepper for my pork adobo.


I can't find pepper corn (pamintang buo) in the grocery so I just settled for crushed pepper (pamintang durog). For this dish, the garlic should be crushed.

The remaining ingredients are bay leaves (laurel) and water.
.

Let's Cook Pork Adobo

 .
The first thing that I did is to cut the pork meat into bite-sized pieces. I then crushed the garlic using my ladle.

The next step is to place the sliced pork meat and crushed garlic in one bowl. I then poured the soy sauce in the mixture. I made sure that the soy sauce covers the whole mixture. The recipe said that I marinate the meat for at least an hour but since I will be eating this for dinner, I marinated the pork meat for 3 hours.  I was preparing my pork adobo just after lunch.

The next is step is to place the pork-garlic-soy sauce mixture into a hot pan. I let it cooked in soy sauce for a few minutes.
.
Marinated pork is simmering (pork adobo).
Marinated pork happily being cooked in soy sauce.

I then poured water when the garlic became brown. I also added the crushed pepper (pamintang durog) and bay leaves (laurel). I waited for the water to boil and then turned down the fire to make it simmer.

The recipe said that I should simmer the pork for 40 minutes to 1 hour. I intended to obey this instruction but I noticed that the water was almost evaporated after 20 minutes of simmering. I was in a dilemma. Should I follow the instruction or should I go to next step?

I checked the meat if it is cooked already by pricking it with a fork. I saw that the meat is already soft and not raw. With, this observation, I decided to go to the next step. That next step is to pour vinegar on the pork meat.
.
Pork adobo is almost cooked.
My pork adobo is almost done.

I waited for few more minutes until I noticed that the sauce had evaporated. What remained is the oil from the pork. That's when I stopped cooking. My pork adobo is done! (Yey!)

Here is the finished product:
.
My very first pork adobo.

This type of pork adobo is what we call as patuyot or dried adobo because there is not much sauce left. Most of the soy sauce and vinegar were either evaporated or absorbed by the pork meat. My father likes to cook the patuyot kind of adobo. My mother, on the other hand, prefers the pork adobo with lot's of sauce like a soup. My mother's pork adobo is perfect for our family because we are so many. Dried pork adobo can only feed few people.
.

My Verdict on This Pork Adobo

.
I think I did good for this pork adobo, though it was my first time to cook this. I think it tasted a little above OK. Although I tasted a hint of a pork meat that is about to be spoiled. This means that I cooked the pork meat just in time (which means I saved it from spoiling).
.

Lessons Learned

 .
The major lesson that I learned while cooking pork adobo is this, “Do not follow instructions in cook books or recipe websites to the letter.”

The condition when the instructions on the cook book were written is different from the condition of my ingredients, stove, utensils, etc. The stove that I am using, for instance, had a problem. The fire go off whenever I turn the fire too low. Thus, I have no choice but to keep the fire beyond the "simmering level". This is the reason why the sauce evaporated in just 20 minutes of simmering.

I learned to treat instructions from cook books and recipe websites as guide only. A good cook knows how to adapt on what is happening to his or her cooking.
.

Other Tips in Cooking Pork Adobo

.
Some of my friends said that the pork don't need marinating. They said that I just saute the garlic then place the meat and then pour the soy sauce. I think their tip is perfect if you are in a rush. Marinating pork meat is important because it allows the pork to absorb the soy sauce.

---

Pork adobo is indeed delicious! So, did you experience cooking this famous Filipino dish? Do you have a question on how to cook pork adobo? Tell me about it by leaving a comment on the comment box below..